When you are reading books for the sole purpose to post a book review, you read books a bit differently. This book is called Shaken and it's by Tim Tebow.
I wasn't exactly sure what to expect since I am not a huge football fan. I knew of him and that he played football and was religious. I think I read somewhere that he doesn't believe in sex before marriage. You don't hear that much lately.
His book started out with his thoughts on the ups and downs of life and how he handles them through his strong beliefs in God and God's plan for him. Thorough out this book, Tim describes many people he has met on his journey that are struggling with life and death. Their beliefs remind him how thankful he is and how putting your trust in God's plan is the way to live the life he has chosen.
This book was written very simply in that it was easy to read and would appeal to all ages. I feel like I got to know him a bit more and appreciate the amount of strength and determination he has to put his faith in the Lord.
Saturday, October 29, 2016

Thursday, October 13, 2016
Book Review
I have recently started a Little Free Library at the office where I work. One suggestion was to join blogging for books as a great resource for books to add to the library. Part of the deal is you review the book. Here we go:
The first book I received was Under the Tuscan Sun by Frances Mayes. I admit I have seen the movie and remember it as a bit boring. This book is not at all like the movie. It's even more boring if that is possible. It's about a restoration of an old house in Tuscany. It includes recipes, gardening directions, weather reports, menus, etc. It wasn't at all what I was expecting and quite honestly I did not finish it. I will put this book in my Little Free Library in the hopes that someone will find it to their liking.
The first book I received was Under the Tuscan Sun by Frances Mayes. I admit I have seen the movie and remember it as a bit boring. This book is not at all like the movie. It's even more boring if that is possible. It's about a restoration of an old house in Tuscany. It includes recipes, gardening directions, weather reports, menus, etc. It wasn't at all what I was expecting and quite honestly I did not finish it. I will put this book in my Little Free Library in the hopes that someone will find it to their liking.
Thursday, March 6, 2014


Saturday, February 1, 2014
How can it be February already???

Oh February....How I love thee.......It's Quilt Retreat month at the Woodcliff Hotel and Spa. It is put on by my favorite quilt shop Ivy Thimble Quilt Shop. I am busy busy busy getting all my projects ready to pack up and bring for the 4 day sewing extravaganza !!! More later...........
Saturday, January 18, 2014
January Block

I am starting off the new year with my quilt squares hanging on my front door. I originally made these for Mom to hang on her door when she lived in Wegmans Cottages. I struggled with this block only using the letters JAN so I found smaller letters and spelled it all out......More than a year has passed and I don't like it anymore. LOL go figure !!
Saturday, November 9, 2013
My Bag Phase
I have only recently realized my obsession with bags. Tote bags. Small zipper bags. Big shopping bags. I have so many. Can you have too many? Here is a photo journal of just "some" of the bags I have made recently.


.jpg)


.jpg)


.jpg)
.jpg)


.jpg)


.jpg)


.jpg)
.jpg)

Ok so maybe it's not just a phase.............
Saturday, November 2, 2013
Luggage Tag Tutorial
I have had so much fun making things from tutorials found on blogs of some of the most creative people. Check out some very user friendly ones at Dog Under My Desk. Erin has some great tips and a page all about interfacing that I linked below. She also has fantastic patterns.
Here is my first attempt at a tutorial.
I used scraps of things I had and bought the little buckle straps at a local craft shop. They were meant to be bracelets but this is so much better. The personal info has been blocked out for instruction photos only.
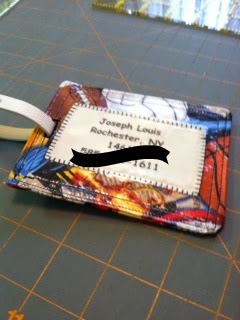


Cut 1 1/2" strips and add them around the address piece.


 A friend at work brought them in. They were used to "pin" her husbands new dress shirt. They are like paper clips and won't leave a mark either.


Once the three sides are sewn, trim the two corners and carefully turn the tag right side out.


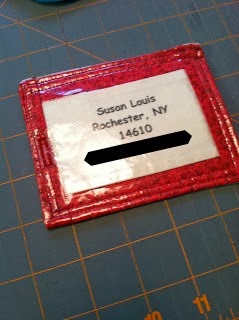


Here is my first attempt at a tutorial.
A very easy luggage tag.
I used scraps of things I had and bought the little buckle straps at a local craft shop. They were meant to be bracelets but this is so much better. The personal info has been blocked out for instruction photos only.

I bought some June Taylor computer printer fabric.
I actually printed out 6 on a page.
Once you cut them up you can't put it back in the printer so plan ahead.
Be sure to peel the paper off the back once you print.
I have 2 different methods shown below.
They both come out the same size about 3 1/2" x 4 1/2"
You will also need the following:
1- 4" x 5" piece of Peltex 70 Interfacing to stiffen the tag
1 - 4" x 5" piece of Slicker - Iron on vinyl to protect the printing
Scraps of theme fabric
Method 1 - 1 piece 4" x 5"
and 4 - 1 1/2 inch strips x 8"
Method 2 - 2 pieces 4" x 5"
And your printed computer fabric
I cut this piece 2 3/4" x 4"
Method 1:
Cut 1 1/2" strips and add them around the address piece.
Then trim the piece down to 4" x 5"
Method 2:
Cut the address piece a bit smaller, place on top of a your theme fabric piece 4" x 5". Blanket stitch around the edges.
From here on the directions are the same.
Next take the piece of Slicker and following the instructions stick the sticky side down over the front address piece. ALWAYS use the paper you peeled off between the iron and the vinyl.

Next with right sides together sew the slicker front to the theme back piece on 3 sides leaving one end open like an envelope.
NOTE: Pins will leave a mark in the slicker.
I used my binding clips since the Slicker makes it very slippery.

Have you seen these??
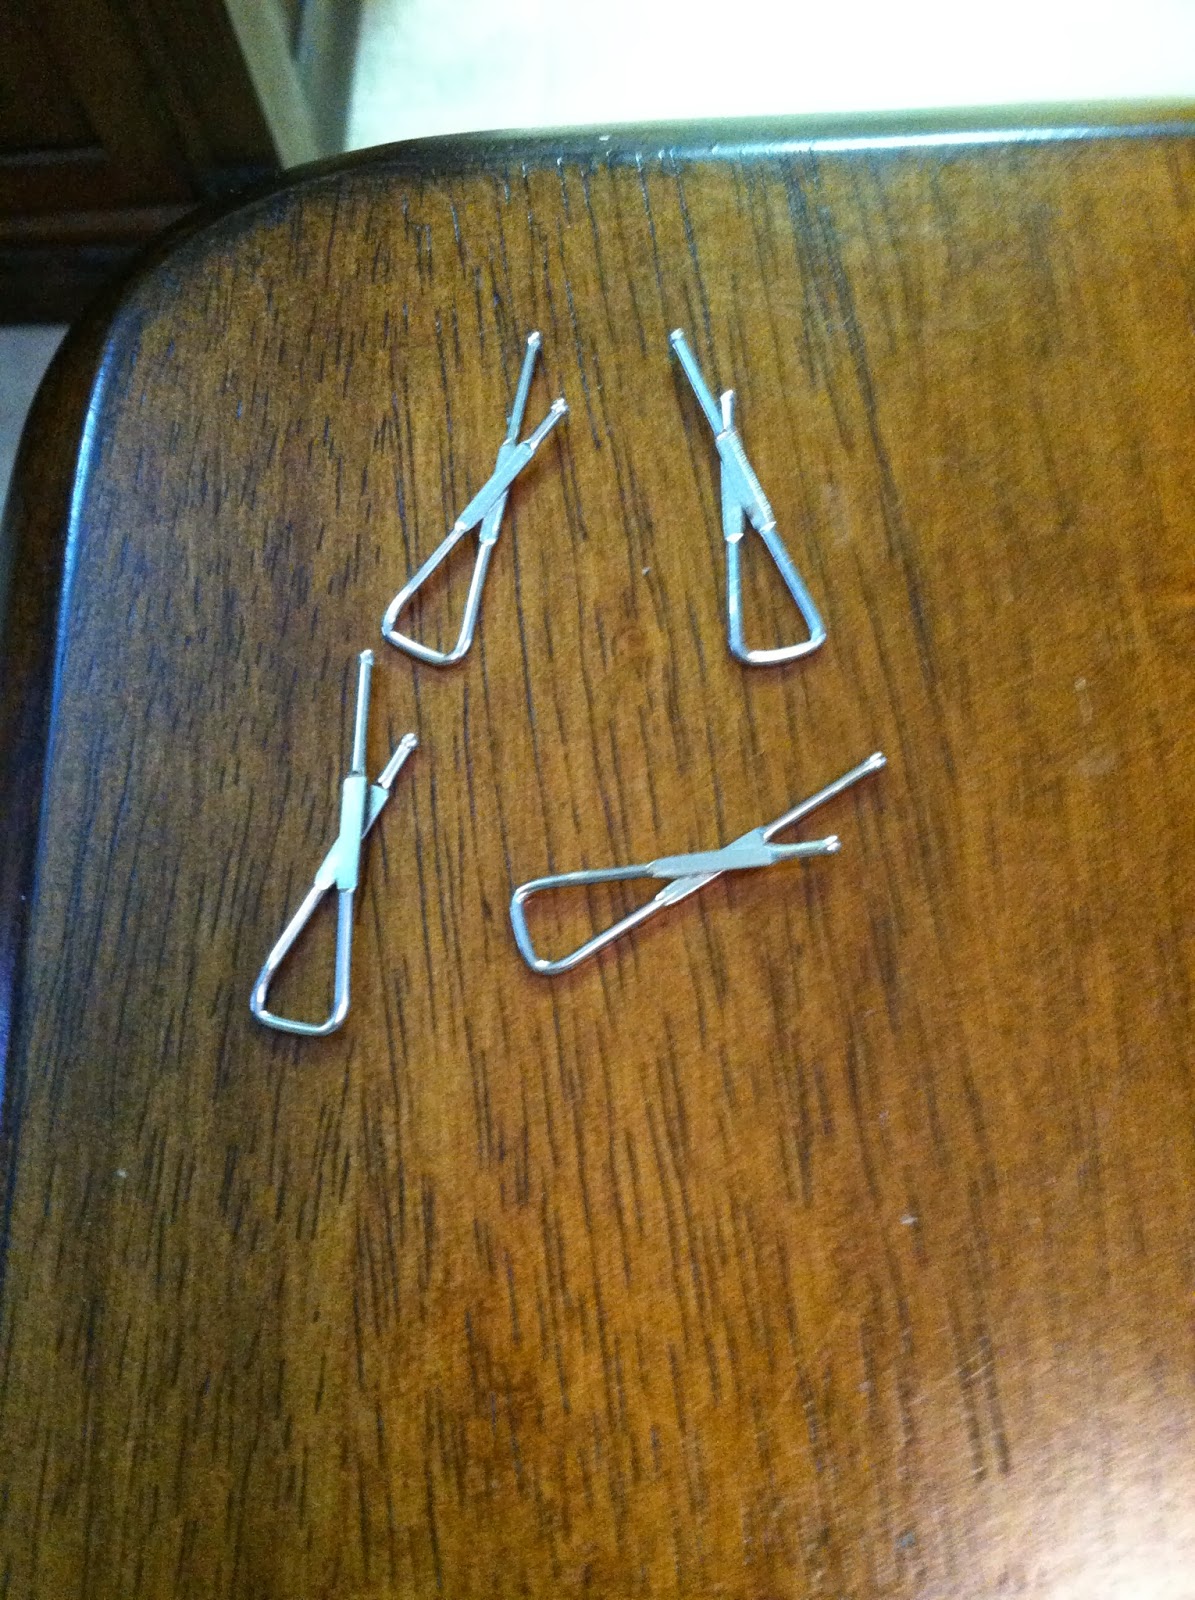

Once the three sides are sewn, trim the two corners and carefully turn the tag right side out.
Cut down the Peltex so it slides easily inside the envelope you have just made.

Turn under the open end and carefully press using your paper.

Topstitch very close to the edge and again 1/4" away on all 4 edges.

A quick button hole at one end and your tag is complete !!

I used this great find at my local craft store but a ribbon or hair elastic would work just as well.

My sister and family are going to Disney this month.

The theme prints make it so much fun !!
Subscribe to:
Posts (Atom)